1. Scope

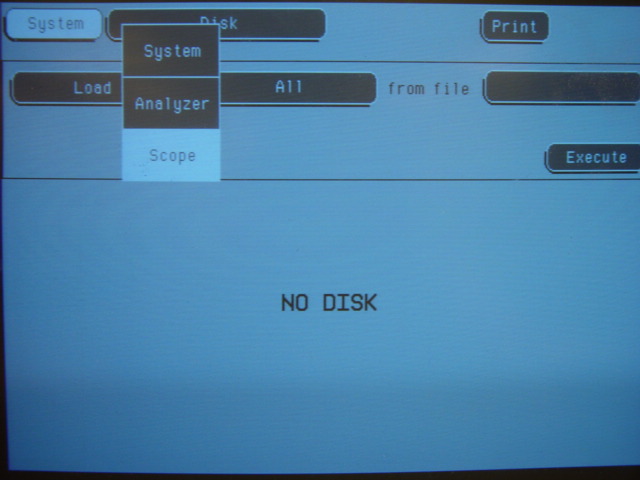
To use as oscilloscope, go to "System" menu (or whatever on the top-left of the screen) and select "Scope"
1.1 Scope Submenu

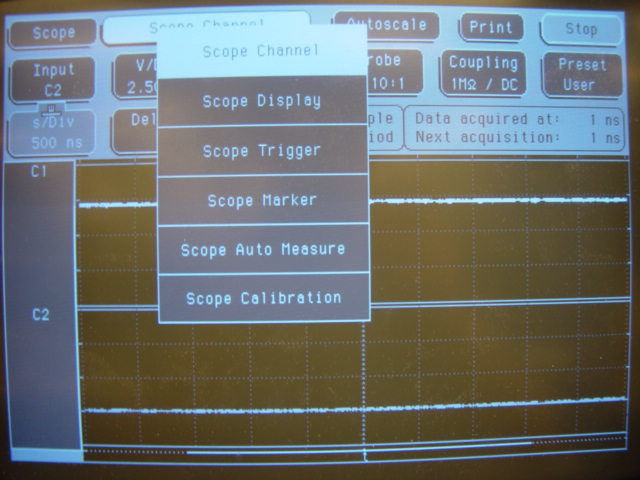
The submenu of scope function includes
1. Scope Channel :
Sets timescale, voltage scale, probe settings.
2. Scope Display :
Sets how to display the signal. Don't worry about this now. You can play with it, though.
3. Scope Trigger :
Decides when to trigger the scope.
4. Scope Marker :
Used to make voltage or time measurements on signals.
5. Scope Auto Measure :
Automatically measures the period, the frequency, the peak-to-peak voltage and other useful information on the signals.
6. Scope Calibration :
You should not have to touch this.
1.2 Scope Channel

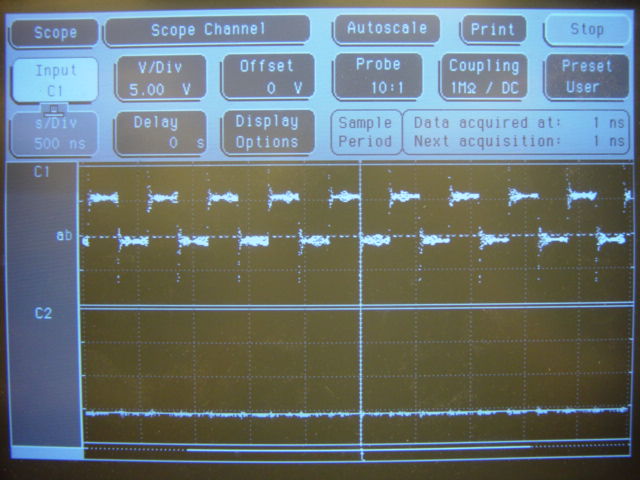
I connected the 1.8Mhz clock signal to the oscilloscope probe connected to the first channel. To observe the signal clearly,
1. Set "Input" to "C1".
2. Set "V/Div" to around 2.5 ~ 5V. This is the voltage per one division on the graph. There are four divisions in the voltage axis.
3. Set "Offset" to around 0 ~ 2.5V. Offset is the voltage in the middle of graph (where the 'ab' line is in this particular picture)
4. If you are using the scope probe given, "Probe" must be set to 10:1. Use the nob.
5. "s/Div" better be comparable to your clock period, 550ns.
To observe signal on channel 2,
1. Set "Input" to "C2".
2. The other steps are the same as the case for channel 1.
To shift the signal to left or right, go to "Delay" and use your nob or enter some number.
1.3 Scope Trigger
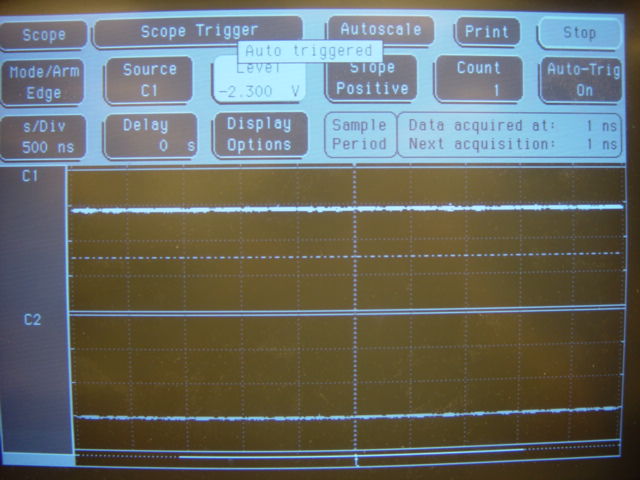
Now let's talk a little bit about "Scope Trigger".

Let's try to catch some signal on its rising edge.
1. Set "Mode/Arm" to Edge
2. Set "Source"
3. Set "Level" to somewhere in the middle of the signal. For example, if your signal low and high are 0V and 5V, respectively, 2.5V would be reasonable. Some bad example would be 0.5V or 4.5V, since the noise would trigger the scope, as well.
4. Set "Slope" to positive if you want rising edge or negative if you want falling edge.
5. Leave "Count" to 1 and Auto-Trig "On" for now.
1.4 Scope Auto Measure
Just choose the menu "Scope Auto Measure".
The scope will measure the clock period, peak-to-peak voltage (Vp-p) and other useful information on the signal of your choice.